Showing posts with label Mexican. Show all posts

Tuesday, October 29, 2013

Coconut Flour Tortillas

How to Make Coconut Flour Tortillas!

Happy Thursday Everyone!
Today I have an extra special treat for you :)  My hubby was nice enough to film me for a little tutorial on how to make coconut flour tortillas.   My lovely Sammy struggled with these so I thought I’d demonstrate!
  • This recipe is from Paleo Comfort Foods.  It’s probably my favorite Paleo cookbook and has helped me make many a delicious meal, they deserve all the credit as I mention in the video.  It’s my hubby’s favorite too because he’s from Mississippi and can still enjoy some Southern favorites, Paleo style!.
http://www.youtube.com/watch?v=7SlBUbYrdbc&feature=g-upl
Coconut Flour Tortillas:
8 egg whites
1/4 cup coconut flour
1/4 teaspoon baking powder
1/2 cup water
Coconut oil
1/4 tsp salt
Whisk all the ingredients together and preheat a nonstick pan with some coconut oil.  Pour about 3 tbsp of mixture into the pan at an angle and swirl around.  Once golden brown, flip.  Make sure that they’re really golden or they’ll rip.  These rock, they held up when they were loaded and taste ah-mazing.
Live to Thrive,
Lauren

Wednesday, October 16, 2013

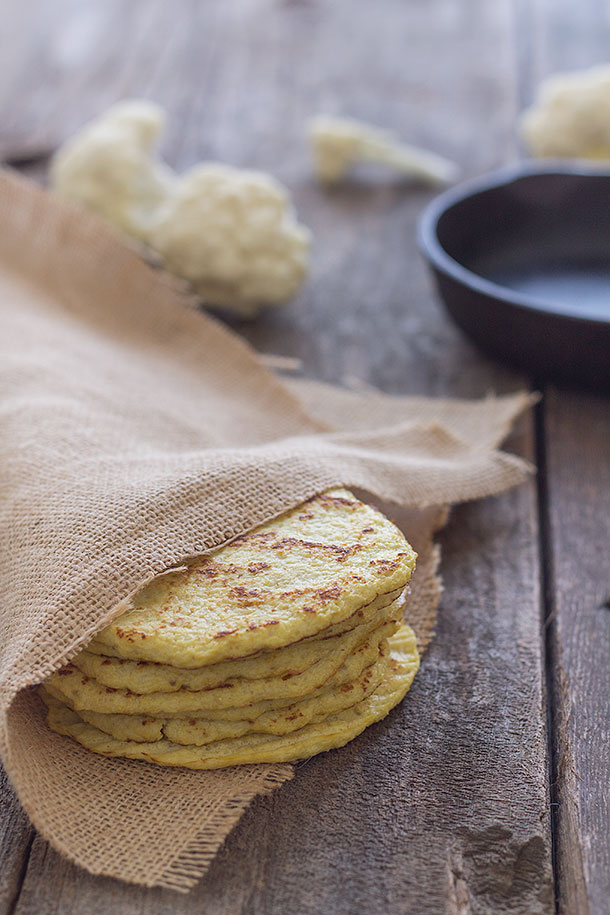
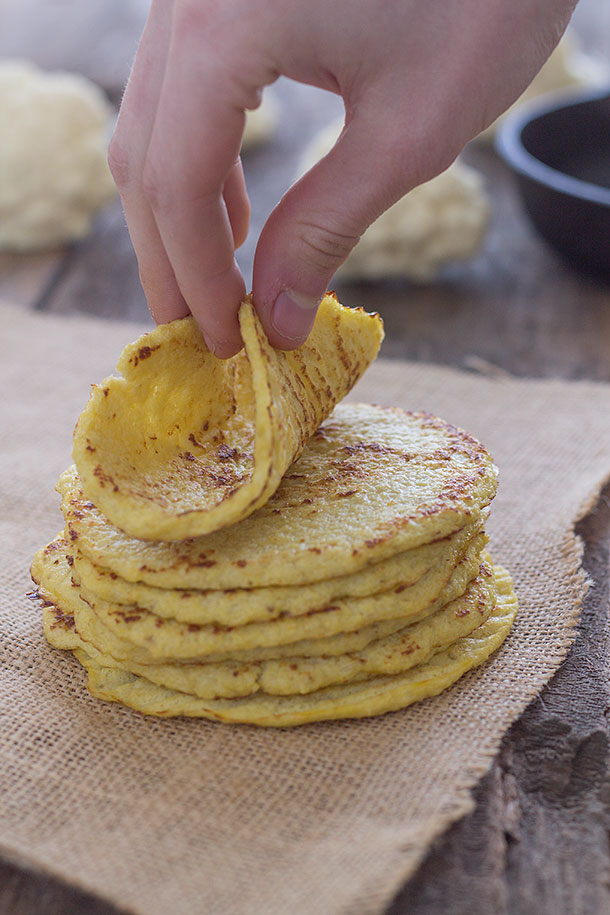
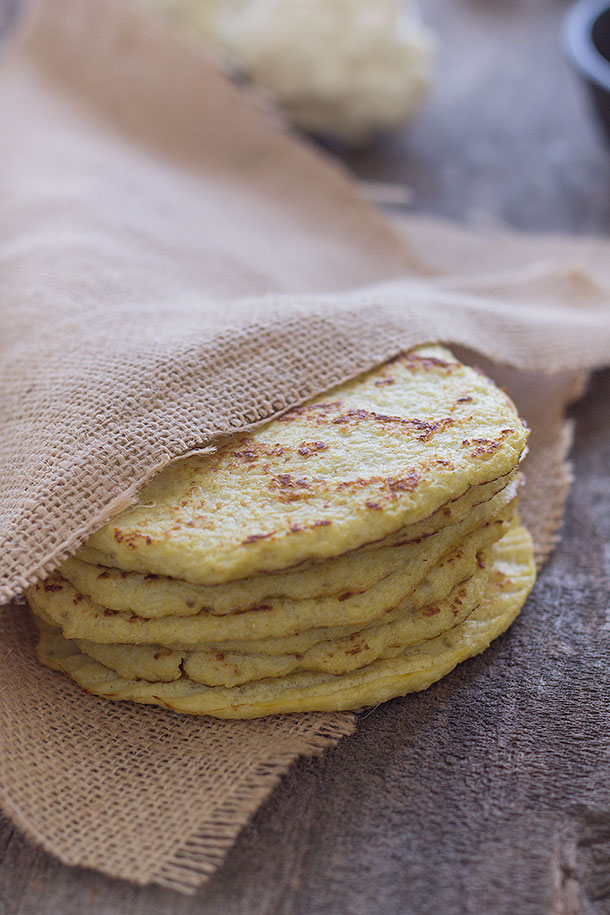
Cauliflower Tortillas


IMG_0190
Cauliflower is so incredibly versatile in the kitchen. Every time I play with it in the kitchen I almost always end up stunning myself with another use for it. And yes I refer to it as playing because I do fairly odd things with it until something interesting happens, and something interesting happens every time. That doesn’t mean that it worked or that it’s functional, just something interesting. Like a gargantuan cauliflower mess which I try to avoid as often as possible.
IMG_8295
Disregarding my misadventures with combustible cauliflower , I do actually really enjoy the taste of cauliflower. At least I do now, and I’m not certain why. I just started eating it out of no where along with other vegetables and now I fully enjoy all of the vegetables under the sun. Even the ones not directly under the sun. Can’t leave out root vegetables right? Even if you don’t like cauliflower or have someone that doesn’t like cauliflower in your home I can tell you now that this actually doesn’t taste like cauliflower at all. It doesn’t taste eggy in my opinion either.
IMG_8303
I personally don’t like something that tastes too eggy if it’s not an egg dish. So this one definitely hits all of those notes. Now when I discovered this beautiful concoction you should have seen the look on my mom’s face and mine. Silence fell upon the room as we slid the golden, warm and soft beauty out of the pan from browning and me and my mom looked at each other at the same time with wide eyes and expressions of befuddlement painted on our faces. It actually looked like a tradition soft tortilla.
IMG_8309
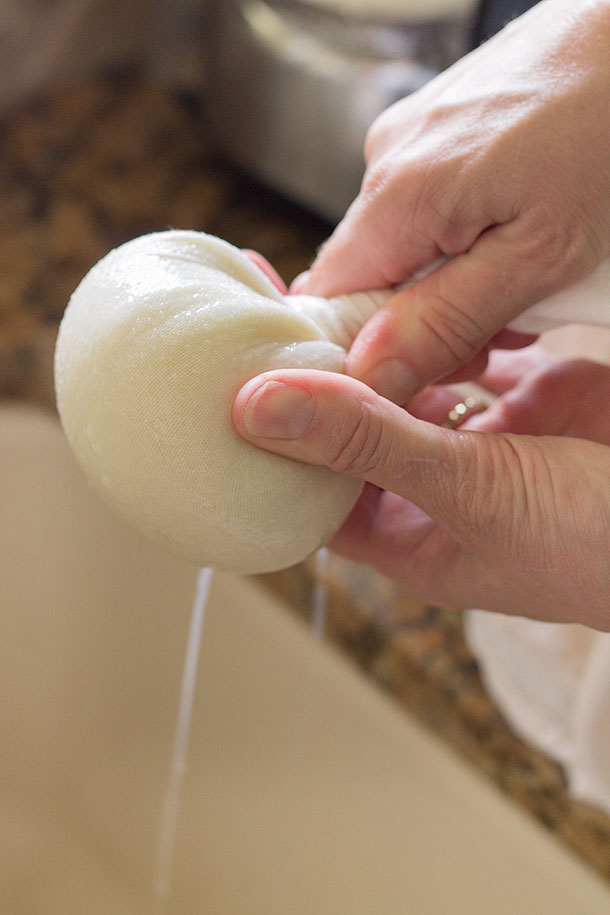
Ironically the drained cauliflower kind of looks like fresh masa flour as well. I personally prefer lettuce wraps because they are fast and easy. But if you’re ever looking for a change of pace this is an excellent way to get your veggies in and have a nice soft and warm tortilla at the same time. That’s a win win in my book. I made these for a recipe for carnitas that I was working on and they went so good with them. Nice crispy and delectable pieces of pork on top a soft tortilla with fresh chopped onions, creamy fresh made grass fed sour cream, my special guacamole, some tangy grass fed Queso Blanco, and finished with some fragrant chopped cilantro.
IMG_0210
I loaded those gorgeous things up and I suggest the same. Luckily they hold a bunch of toppings and ingredients pretty well so don’t be afraid to bulk up on toppings.  And everyone would have been none the wiser to the fact that they were also get a dose of cauliflower in that. At least we can hope that they don’t know they are eating paleo tortillas.
IMG_0194

Cauliflower Tortillas (Paleo, Grain Free, Gluten free)
4.8 from 41 reviews

Print
 
Prep time:
Cook time:
Total time:
Serves: 6-7
Ingredients
  • ¾ a head of cauliflower riced or 2 cups riced and packed
  • 2 eggs
  • salt and pepper to taste
Instructions
  1. Preheat oven to 375 degrees and line a baking tray with parchment paper.
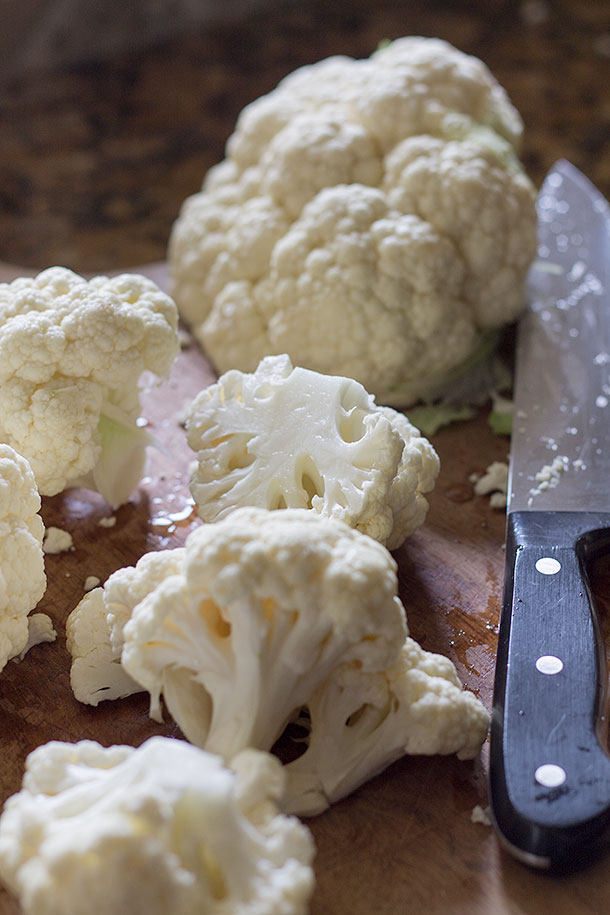
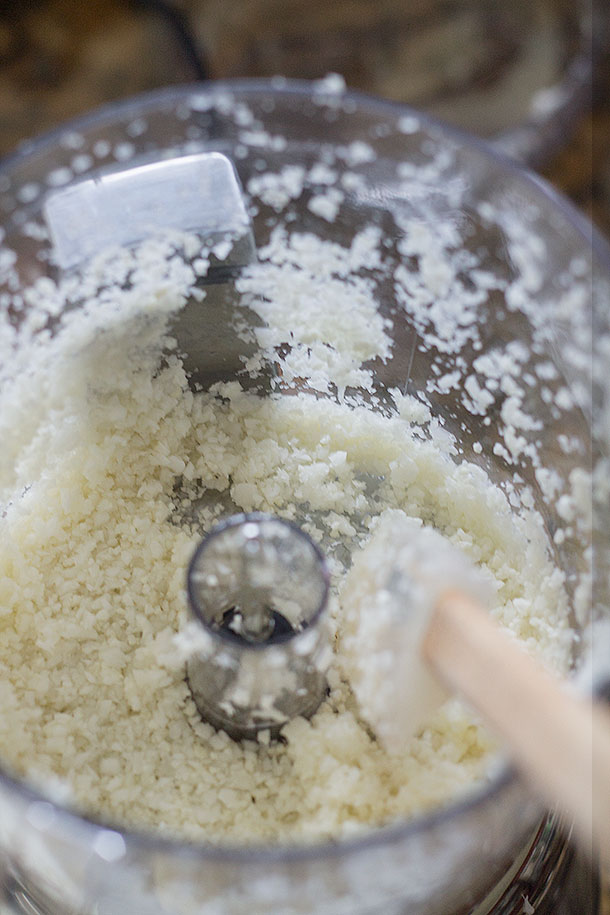
  2. For these I actually rice my cauliflower slightly more fine that cauliflower rice. Toss ¾ a head of cauliflower cut up and most of the stem removed and pulse until you get a texture slightly finer than rice. (Once it’s riced measure it to make sure you have 2 cups packed.)
  3. Place riced cauliflower in bowl and microwave for 2 minutes and stir, then another two minutes and stir again then place in a dish towel and squeeze excess water out as hard as you can. (You’re going to want to get out as much water as you can and be careful not to burn yourself because it’s going to be very hot.)
  4. Place drained cauliflower back in bowl and add two eggs, salt and pepper and mix until well combined.
  5. As a note it will be a little bit runny but shouldn’t be pure liquid either. Spread mixture onto a baking sheet into 6 small fairly flat circles.
  6. Place in the oven for 10 minutes then pull out of the oven and carefully peel them off the parchment and flip them and place back in the oven for 5-7 more minutes.
  7. Once they’re done place them on a wire rack to cool slightly.
  8. Heat a medium sized pan over medium heat and place the tortillas into the pan pressing down slightly and brown them to your liking. (Don’t skip this step because it gives them slightly crispy on the edges and gives them a wonderfully nutty taste)
Notes
As it turns out Empowered Sustenance did a recipe that was similar to mine and she did it before me! I suppose great minds think alike. Also if you don’t know what to serve with these my favorite things that I’ve made with them so far are my Carnitas and Huevos Rancheros.

Green Chili Chicken and "Rice"

adapted from her recipe:

http://www.elanaspantry.com/mexican-chicken-and-rice/

mexican chicken and "rice"
This may be one of the worst food photos I’ve ever taken, however, this gluten free, grain free chicken and ”rice” dish is packed with protein and spicy Mexican flavor.  It’s not so easy to take pictures of brown stuff; I could say more, however, I won’t go on; let’s just leave it at that.
Since I don’t eat grains, this faux rice is a real treat for me.  My husband liked it too.

Mexican Chicken and Rice

  • 4 tablespoons olive oil
  • 1 medium onion, diced
  • 2 garlic, grated
  • 1 cup celery, finely diced
  • 1 head cauliflower, trimmed
  • 2 (4 ounce) can green chilies, diced
  • 1 pound boneless, skinless chicken breast, grilled and diced into 1-inch pieces
  • 1 teaspoon celtic sea salt
  • ground cumin, oregano and chili powder to taste
  • 1 avocado
  • salsa, if desired
  1. In a large skillet, heat olive oil over medium heat
  2. Saute onion over medium heat for 10 minutes, until soft
  3. Add celery to skillet and saute for 5 minutes
  4. Place cauliflower in a food processor with the “S” blade and process until the texture of rice
  5. Add cauliflower to skillet, cover and cook 5-10 minutes, until soft
  6. Mix chilies and chicken into skillet
  7. Stir in salt, cumin, oregano and chili powder
  8. Serve, topping with avocado, cheese and salsa if desired
 
The idea for this Mexican Chicken and Rice came off of a low carb yahoo group in which I participate.  That recipe was shared by a user named “glassmurf.”  Her version used frozen cauliflower, 6 chicken breasts, plus cheese and tomato sauce, so as you can see, I took her basic idea and “Elanafied” it into something that would work for me and my family.  Thank you glassmurf for your excellent inspiration.

Guacamole Salad


I made this to go alongside a pork butt Brandon smoked this weekend. I figured why not chop up some standard guac ingredients, toss in some refresher veggies like cukes and voila, I’ve made a chewable guacamole, though that title doesn’t sound quite as appetizing as guacamole salad, to me anyway. When we sat down to eat, I kept hovering over Brandon, eyeballing how many forkfuls of salad he was putting into his mouth. I said, more than once (read: nagged), “Heyyyy babeeeee, make sure to leave some so I can have it for leftovers. *Smile*”  I was kind of obsessed with this.

Ingredients

  • 2 avocados, diced
  • 1 English cucumber, diced
  • 4 large-ish tomatillos, diced
  • 1/2 red onion, finely diced
  • handful cilantro, chopped
  • 2 limes, juiced
  • salt

Method

The only thing I really need to explain (probably) is how to deal with tomatillos, so here goes…
Remove the green husks. You’ll feel that the tomatillo is slightly sticky to the touch. Rinse those suckers under some warm water, then chop ‘em up like the rest of the ingredients.
In a large bowl, add all ingredients together. Consume.

Too Easy Chicken Adobo and Roasted Greens with Beets and Garlic

June 5, 2012 by 42 Comments


Adobo Chicken - Everyday Paleo
I have mentioned before that John’s grandpa was from the Philippines and for his family; Filipino food was a staple. I have created a paleo version of one of John’s favorite dishes before, and you can find my Paleo Pancit recipe here.  
Today’s post is about Chicken Adobo. Adobo is an extremely popular Filipino dish and the other night I made a super fast version of this yummy meal using coconut aminos instead of the standard soy sauce and the end result was delicious!

We served the chicken on top of a mix of greens that I roasted with some fresh garlic, thinly sliced beets and coconut oil.
Here’s how I made the chicken:
Too Easy Chicken Adobo
2 lbs boneless skinless chicken thighs (seasoned lightly on both sides with salt and pepper. You can also use skin on and bone in but you’ll need to up the cooking time by about 10 minutes once the chicken is in the sauce.)
1/4 cup coconut oil
½ medium red onion, diced
3-4 garlic cloves minced
½ cup chicken broth
¼ cup apple cider vinegar
Lots of black pepper
 
1. In a large skillet heat the coconut oil over medium to medium high heat.
2. Once the oil is nice and hot, place the chicken thighs into the oil and brown on both sides (about 3-4 minutes per side).
3. Remove the browned chicken from the pan and set aside.
4. Add to the same pan the onions and saute in the remaining oil until the onions are translucent.  Add the garlic and saute for another 30 seconds or just until fragrant.
5. Add the chicken broth, coconut aminos, and apple cider vinegar to the onions and garlic and whisk together well. Bring the sauce to a simmer.
6. Add the chicken back to the sauce, in the pan, turn the heat down to low and cover.  Simmer the chicken in the sauce for five minutes, turn the chicken over, cover and cook for another five minutes.  Season with plenty of black pepper and serve on its own or on a bed of greens like we did.
Roasted Mixed Greens with Beets and Garlic
This is more of an idea than an actual recipe. I used what veggies that I had leftover from my CSA box and made this dish to go with our easy chicken adobo.
2 bunches of kale
1 bunch of rainbow chard
6 garlic cloves, thinly sliced
4 small beets, peeled, halved, and thinly sliced.
Coconut oil
1. Preheat oven to 375.
2. Wash and dry the greens and remove the leaves from the tough stems.
4. Chop the greens into small pieces and spread them evenly on a baking sheet.
5. Evenly spread the sliced garlic on top of the greens.
5. Evenly spread the sliced beets on top of the greens.
6. Drizzle with plenty of melted coconut oil.
7. Season with a little bit of salt and pepper.
Roast in the preheated oven for 20-30 minutes or until the beets and garlic are tender.
As always, enjoy!!

Mexican Stuffed Bell Peppers

 from:  http://fastpaleo.com/recipe/mexican-stuffed-bell-peppers/?ref=nf

IMG_1302
Preheat Oven to 350. Brown beef with 2 Tablespoons Chilli Powder, 1/2 Tablespoon Garlic Salt, 1 Tablespoon Cumin, 1/2 Tablespoon Red pepper, 1 Tablespoon Paprika, 1 Tablespoon Onion Powder, and 1 Teaspoon Oregano.
While it is browning, chop the white onion and cilantro. Add onion and cilantro to the beef and saute another 5 minutes. Half and seed the bell peppers. Take one half bell pepper, finely dice it. Add diced bell pepper, canned tomatoes, 6oz can of tomato paste (if you like \’em creamy), and olives to the meat mixture.
Spray a glass pan with olive oil and place bell peppers open side up. Push the meat mixture to one side for the pan and tilt it so that any access liquid drains to the other side. Spoon out any excess liquid. fill each pepper with the meat mixture. Bake for 30 minutes.
While they are baking, mash up the avocados and 1 Teaspoon Garlic Powder. When they are done scoop some guacamole on top and use salsa as desired.

Ingredients

  • 1lb Lean Ground Beef (grass fed ideal)
  • 1 Chopped Onion
  • 1 Can tomatoes with green chillies
  • 1 hand full chopped Cilantro
  • 1/2 can Black Olives sliced
  • 4 Yellow Bell Peppers
  • fresh salsa
  • 3 avocados plus 1 t. g.p.
 

Tuesday, October 15, 2013

Arroz Con Pollo

 from: http://earthenergyyoga.com/cauliflower-spanish-rice-chicken-arroz-con-pollo/

Summary: An almost traditional Spanish dish :)

Ingredients

  • 1.5 – 2 lbs chicken breast or thighs, cut into bite sized pieces
  • salt & pepper
  • paprika
  • 1/2 cup chicken stock (preferably homemade)
  • 1/4 – 1/2 tsp saffron threads (don't have it)
  • 1 onion, diced
  • 1 jalapeño, diced
  • 1/2 red bell pepper, diced
  • 1/2 green bell pepper, diced
  • 1 bay leaf
  • 3 cloves garlic, minced
  • 1 14.5 oz can diced tomatoes
  • 1 teaspoon cumin
  • 2 teaspoons sea salt
  • 1 head cauliflower, grated into rice

Instructions

  • Begin heating the chicken stock on medium low heat and add saffron threads. Steep for at least 30 minutes (the longer the better).
  • Season the chicken with the salt, pepper, and paprika.
  • In a deep sauté pan, heat your preferred cooking fat and brown the chicken for 5-7 minutes on medium heat.
  • Add the onions, peppers, jalapeño, garlic and bay leaf and sauté until soft, about 5 minutes.
  • Add the can of tomatoes, saffron stock, cumin, salt and cauliflower.
  • Cover and simmer 10-12 minutes until the chicken and cauliflower is cooked through.

Chicken Tortilla-less Soup

http://paleocomfortfoods.com/recipes/its-almost-summer-that-means-soup-right/
Yield: Approximately 8-1o main course servings, more or less depending on how hungry we are! And Whole30 friendly!
Paleo Comfort Foods Chicken Tortilla-less Soup
Campbell's soup was never this mmm-mmm good!

Ingredients3 pounds chicken breasts (you can use bone-in, skin-on if you’d like, or boneless skinless. The goal is to have somewhere close to 2 or more pounds of cooked chicken at the end)
3 tablespoons of oil of your choice, divided (we used coconut oil)
2-3 teaspoons of fajita or taco seasoning (use a mix of ground cumin, chili powder, garlic powder and cayenne if you don’t have)
1 large or 2 medium onions, diced
6 cloves garlic, minced
2 jalapeno peppers, diced
1-2 poblano peppers, diced
2 quarts (8 cups) chicken stock
1 28 ounce can of fire roasted tomatoes (if you can’t find fire-roasted, you can either fire-roast your own, or just use regular canned tomoatoes**)
Juice of 2 limes
1 cup cilantro, chopped
avocado and fresh cilantro for garnish
** – according to Muir Glen, they started using BPA-free cans in their 2011 packaging cycle. You can read more here and here.
Instructions1. Preheat your oven 375 degrees Fahrenheit (350 for convection). Place your chicken breasts in a large baking pan, and pour one tablespoon of oil over all, coating well. Sprinkle your fajita seasoning over the chicken, coating well, and place in the oven. Cook for about 30-45 minutes (depending on the size of the chicken pieces) until cooked through and liquid from chicken runs clear. Using two forks, shred the chicken (while this is not so easy to do while the chicken is hot, I find I get a better “shred” if I do so while the chicken is still hot). Alternately, you can just chop the chicken into small pieces.
2. Meanwhile, in a large dutch oven over medium heat, melt the remaining 2 tablespoons of oil, and when hot, add in the onions. Cook until onions are translucent, about 4-6 minutes.
3. Add in the garlic and peppers and saute for about 1-2 minutes, until fragrant.
4. Pour in the chicken stock and fire roasted tomatoes and bring to a medium boil.
5. [THIS STEP IS OPTIONAL] If you want a slightly thickened soup, strain out some of the tomatoes, onions and peppers to a blender or Magic Bullet and puree. Pour back into the broth mixture. I did this with about 1/2 of the solids in the soup.
6. Add the chicken, cilantro and lime juice to your bubbling cauldron of goodness. Taste to see what you’re in need of (salt? pepper? more of a kick?) and adjust as need be.
7. Serve nice and hot with some fresh cilantro and chopped up avocado to go on top. Maybe a wedge of lime if you’re feeling pretty tart, or some extra diced up jalapenos or poblanos if you need more heat. Heck, get out the hot sauce if you really want some zing!
Bucking that whole iced tea trend, what hot foods or beverages do you like to enjoy in the heat of the summer? What soups do you most look forward to in the summer? Happy eating friends!
Paleo Comfort Foods Chicken Tortilla Soup

Taco and “Rice” Stuffed Acorn Squash

My Whole30 is over, but I wanted to share the meal I had on the last day….Taco and “Rice” Stuffed Acorn Squash.  I absolutely loved the slightly sweet acorn squash paired with the spiciness of the taco meat and caul-rice.  They balance each other out very well.  Acorn squash is a nice hearty vegetable that I tried for the first time this year.  It’s now one of my favorites.  While it is not very low in carbs, it still fits within the range of a moderate carb diet.  I definitely recommend giving it a try, but if the acorn squash doesn’t work for you then try it with zucchini (will require less baking time).
What is your favorite way to use taco meat?  I’d love to hear about it in the comments below. :)
Taco and “Rice” Stuffed Acorn Squash
Ingredients
  • 1 lb ground grass fed beef
  • 1/2 onion, diced
  • 2 Acorn Squash
  • 2 cups cauli-rice*
  • 4 1/2 Tbsp taco seasoning (recipe below) or the AcroAma Tex Mex Blend
  • 1/2 cup water
Instructions
  1. Preheat the oven to 450 F
  2. Cut the acorn squash in half, length-wise and scoop out the seeds and core
  3. Brush with quality oil and season with salt and pepper
  4. Place cut side up on a foil lined roasting pan and bake for 25-30 minutes.
  5. Meanwhile, heat 1 Tbsp of quality oil in a large skillet, over medium heat
  6. Add the onions and cook until tender (about 5 minutes)
  7. Add the ground beef and cook until mostly browned
  8. Add the cauli-rice and cook for another 2-3 minutes
  9. Add the taco seasoning and the water and cook until the water has absorbed (about 4-5 minutes)
  10. Once the acorn squash have finished roasting, stuff each squash evenly with the taco mixture
  11. Place the squash back in the oven for another 20-25 minutes or until tender (cover with foil halfway through)
  12. Serve--a perfect taco bowl
  13. *To rice cauliflower, trim the leaves and core off the head of cauliflower. Cut the cauliflower into florets and place them in the bowl of a food processor. Pulse until the cauliflower is the size and shape of rice.
Notes
Net Carb Count*: Taco and "Rice" Stuffed Acorn Squash: 23.9 net carbs (per serving--serves 4)
*Note carb counts are estimated based on the products I used. Check nutrition labels for accurate carb counts and gluten information.

Schema/Recipe SEO Data Markup by ZipList Recipe Plugin
http://lowcarboneday.com/2013/02/taco-rice-stuffed-acorn-squash.html
Homemade Taco Seasoning
Ingredients
  • 3 Tbsp chili powder
  • 4 tsp cumin
  • 1 Tbsp salt
  • 1 Tbsp pepper
  • 2 tsp paprika
  • 1 tsp garlic powder
  • 1 tsp onion powder
  • 1 tsp oregano
  • 1/2 tsp cayenne pepper (or more for heat)
Instructions
  1. Combine all the ingredients (I like to pulse mine in a spice grinder)
  2. Use as directed in recipes
Notes
Store any leftover seasoning in an air-tight container
Net Carb Count*: Homemade Taco Seasoning: 16.5 net carbs (entire recipe--makes 6.5 Tbsp)
*Note carb counts are estimated based on the products I used. Check nutrition labels for accurate carb counts and gluten information.
Schema/Recipe SEO Data Markup by ZipList Recipe Plugin
http://lowcarboneday.com/2013/02/taco-rice-stuffed-acorn-squash.html

 Enjoy!
~Karen

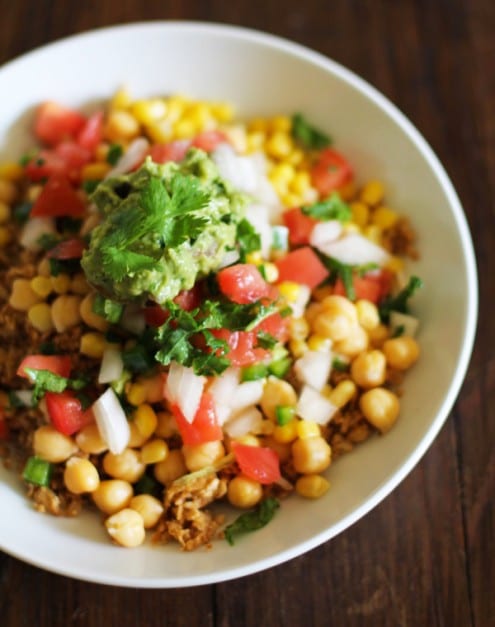
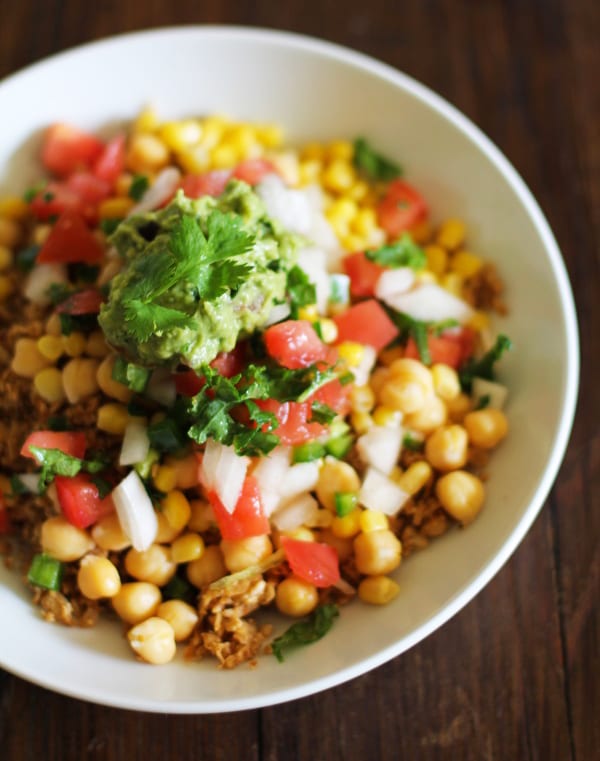
Cauliflower-Rice and Guacamole Burrito Bowl

Cauliflower-Rice and Guacamole Burrito Bowl


Prep Time

Cook Time

Total Time

 This hodgepodge dinner is comforting and cravable but still nutritious with cauliflower rice replacing regular rice.
Author:
Recipe Type: Main
 

Ingredients
For the Cauliflower Rice:
  • 2 tablespoons ghee or olive oil
  • 1 head cauliflower, grated
  • 1 lime, juiced
  • 1 tablespoon chili powder
  • 2 teaspoons onion powder
  • ¾ teaspoon kosher salt
For the guacamole:
  • 2 ripe avocadoes
  • 2 cloves garlic, minced
  • 1 lime, juiced
  • 2 tablespoons red onion, chopped
  • 1 jalapeno, seeded and chopped
  • 1 roma tomato, seeded and diced
  • 1 tablespoon fresh cilantro, chopped
  • Salt to taste
For the Burrito Bowls:
 
  • Guacamole
  • Cauliflower Rice
  • Pico de Gallo
  • Cilantro for serving
Instructions
To Prepare the Cauliflower Rice:
  1. Remove the green stems off the cauliflower and chop the head of cauliflower in half.
  2. Grate the whole head (one half at a time) on the box grater. It’s okay if you leave some small florets.
  3. In a large skillet, heat oil to medium-high heat.
  4. Add the cauliflower, lime juice, chili powder, onion powder, and salt. Stir everything together and cover the skillet.
  5. Cook the cauliflower, stirring consistently, until it is softened and browned, about 15 to 20 minutes.
To Make the Guacamole:
  1. Peel and pit the avocados and place them in a bowl.
  2. Add the lime juice, garlic, onion, jalapeno, and mash with a fork or chop with a knife (to leave the guacamole chunky, use a knife to chop everything together).
  3. Add the chopped tomato and cilantro and fold into the guacamole.
To make awesome burrito bowls:
  1. Dish desired amount of cauliflower rice into a bowl. Add pico de gallo and guacamole and go to town!

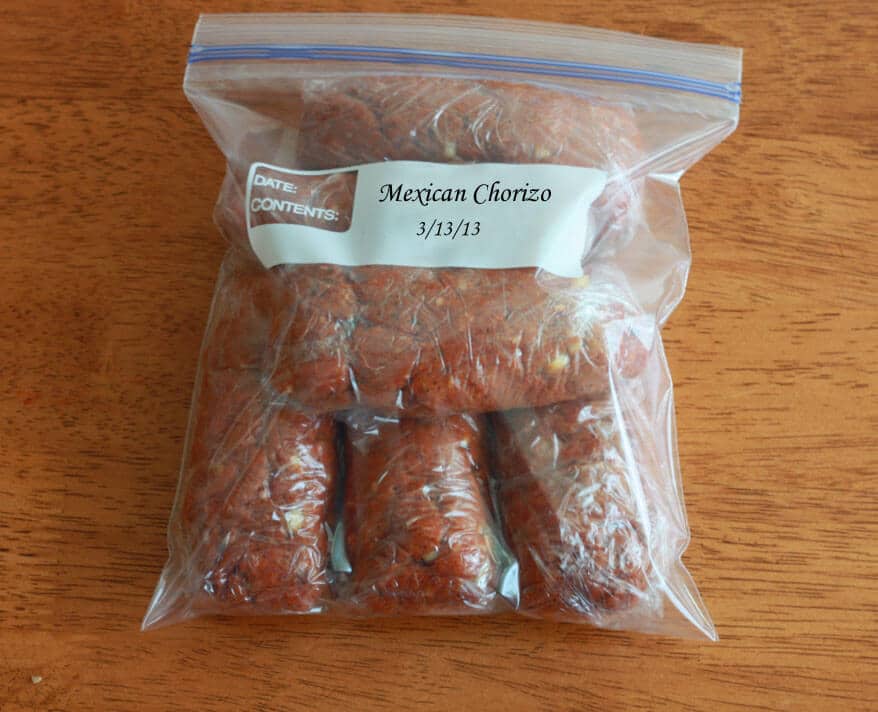
Chorizo


Authentic in flavor, easy to make, and with ingredients you can trust.
Serves: 1½ pounds

Ingredients
  • 1 lb coarsely ground lean pork
  • 6 oz coarsely ground pork fat
  • 5 cloves garlic, minced
  • 2 tablespoons ancho chile powder
  • 1 tablespoon sweet paprika
  • 1 teaspoon smoked paprika
  • 1½ teaspoons salt
  • 2 teaspoons dried Mexican oregano
  • ½ teaspoon freshly ground black pepper
  • ½ teaspoon ground cumin
  • ½ teaspoon ground coriander
  • ¼ teaspoon ground cinnamon
  • ¼ teaspoon ground cloves
  • 4 tablespoons cider vinegar
Instructions
  1. Place the meat in a large bowl and all  remaining ingredients. Use your hands to thoroughly combine the mixture.
  2. Place the chorizo in a colander or sieve over a bowl, cover tightly with plastic wrap, and refrigerate for 3 days, daily squeezing out and discarding any liquid.
  3. After 3 days, divide the meat up into 6 little 4 oz. loaves, wrap each one in plastic wrap and place the loaves in a freezer bag or wrap again in aluminum foil. You can also use wax or freezer paper.
  4. The chorizo will keep in the freezer for up to 4 months. Storing it longer doesn’t really pose a safety concern, but the taste will suffer.
  5. Makes 1½ pounds, divided into six 4 oz. servings.